Connect ChatGPT to your Bloggo blog
Bloggo can be run from a ChatGPT chat. You connect Bloggo once, and then you can ask ChatGPT to write a post from your notes, edit one, publish it, add a picture or tell you how a post is doing. This page shows how to connect it, step by step.
The important part is the key. ChatGPT never gets your blog's API key and never sees it. You sign in on a Bloggo page, and ChatGPT only receives a pass that Bloggo made for it. If you ever want to cut it off, you can.
What you need
- A ChatGPT account that can add a custom MCP server (a paid plan, on the web). OpenAI moves these menus around from time to time, so yours may be named a little differently from the screenshots below.
- One of these Bloggo keys:
- An editor key of your blog. It lets ChatGPT write and publish posts, and nothing more. This is the one to use.
- An owner key also works, but gains nothing: ChatGPT is limited to what an editor can do either way.
- An invitation key, if you don't have a blog yet. Bloggo makes the blog for you during the sign-in.
To make an editor key, use your owner key:
curl -X POST https://api.bloggo.blog/v1/keys \
  -H "Authorization: Bearer $KEY" -H "Content-Type: application/json" \
  -d '{"name":"chatgpt","role":"editor"}'
The new key is in the answer, shown once. Keep it somewhere private until step 2.
1. Add a custom MCP server
On chatgpt.com, open Plugins in the left sidebar, press Add at the top right and choose Add custom MCP server.
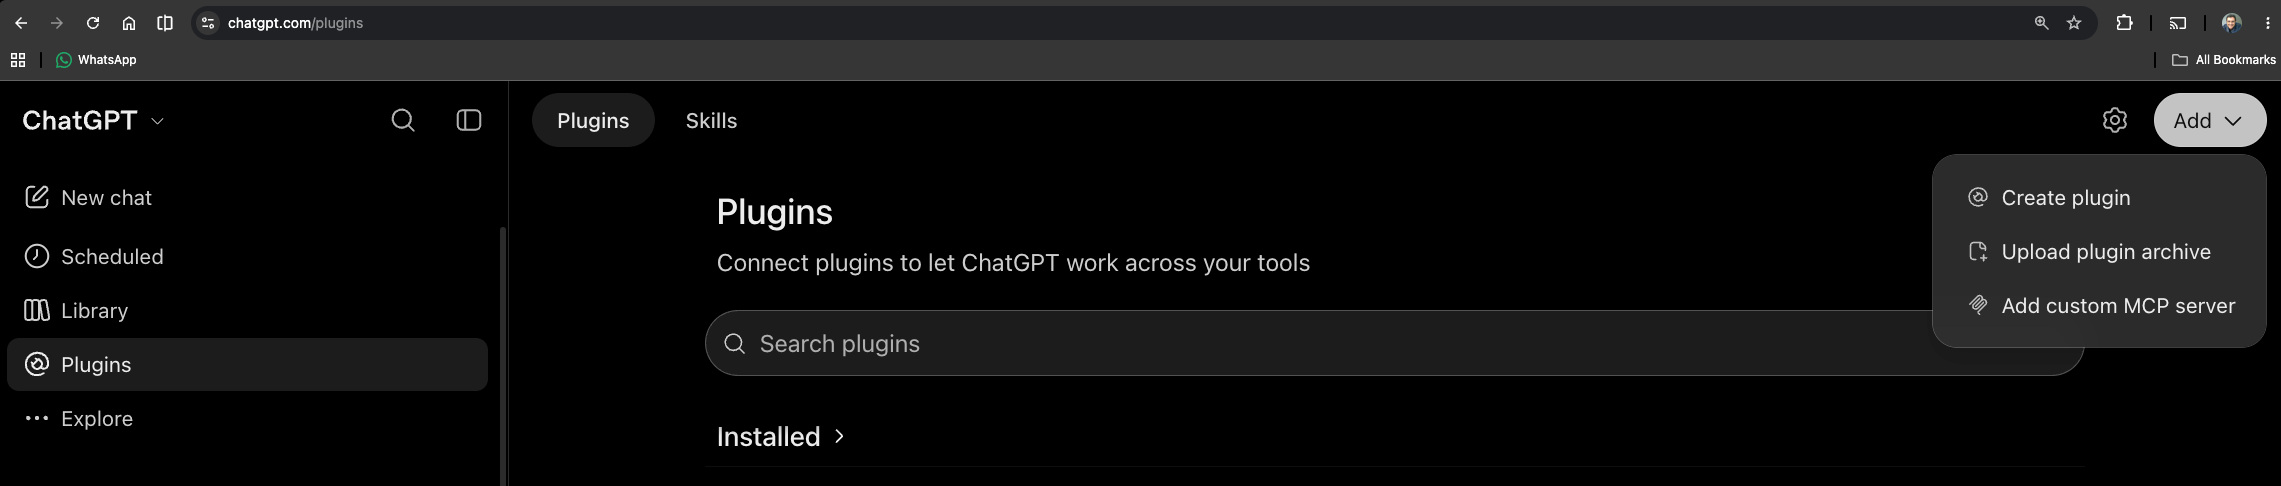
If you don't see that menu, ChatGPT may still be asking for developer mode first: open Settings, look under Apps (or Connectors) for Advanced settings and switch on Developer mode, then add the server from there.
2. Fill in the form
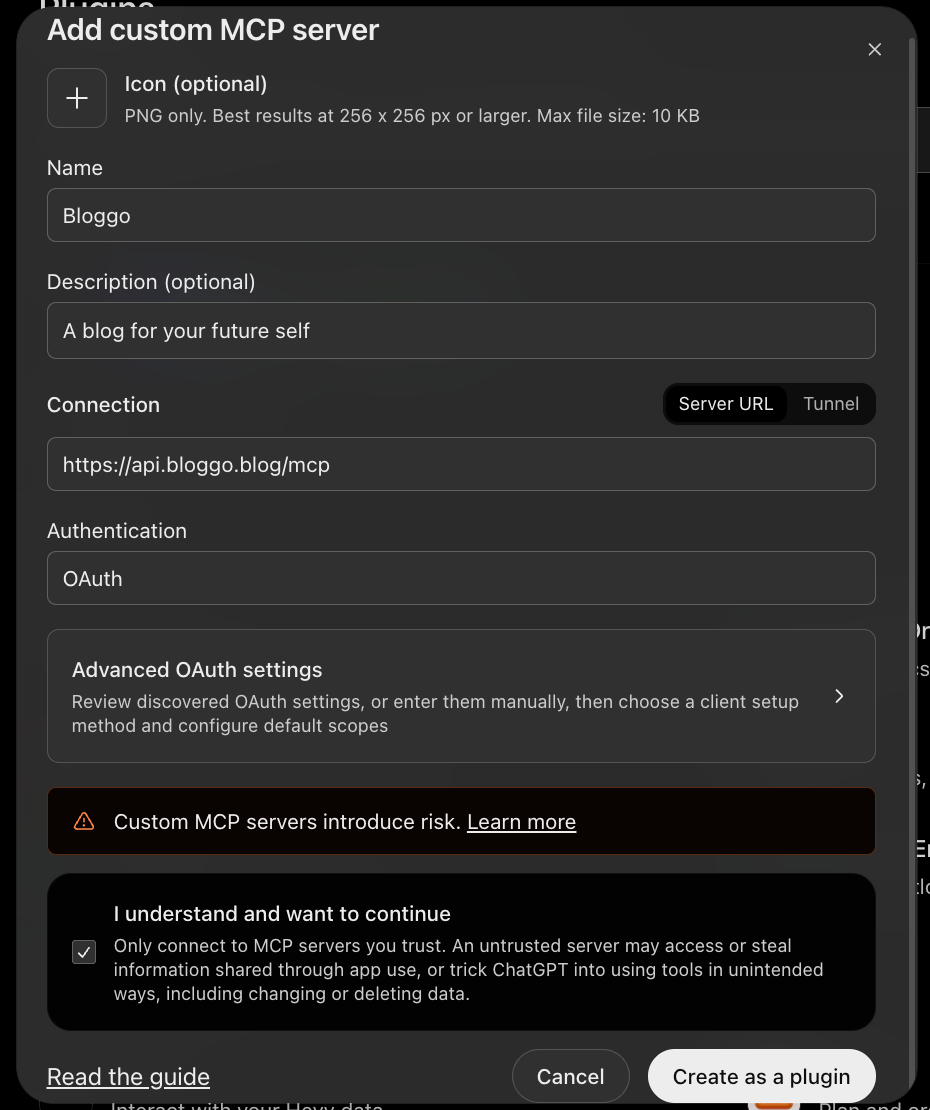
Fill in:
- Name:
Bloggo - Description: optional, anything you like.
- Connection: choose Server URL and enter
https://api.bloggo.blog/mcp. - Authentication:
OAuth. Leave Advanced OAuth settings alone: ChatGPT finds Bloggo's settings and registers itself.
Tick I understand and want to continue (ChatGPT asks you to only connect servers you trust) and press Create as a plugin.
3. Sign in on Bloggo's page
ChatGPT sends you to a Bloggo page on api.bloggo.blog. It says what ChatGPT will be able to do (read your posts, write, edit, publish, delete) and what it will not (manage keys, reader keys or access links). Paste your editor key in the box and press Connect.
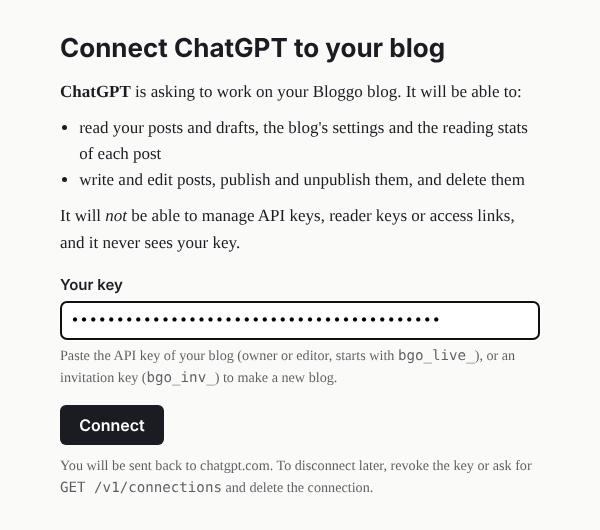
The page's address is Bloggo's, not ChatGPT's, and that is the point: the key goes to Bloggo and stays there. You are sent back to ChatGPT, and Bloggo is now one of your plugins.
If you don't have a blog yet
Paste an invitation key (it starts with bgo_inv_) instead. The page then asks for the blog's details:
- Blog address: where readers will find it,
your-address.bloggo.blog. Lowercase letters, digits and dashes. - Blog name: the title shown on every page.
- Tagline: optional, one short line under the name.
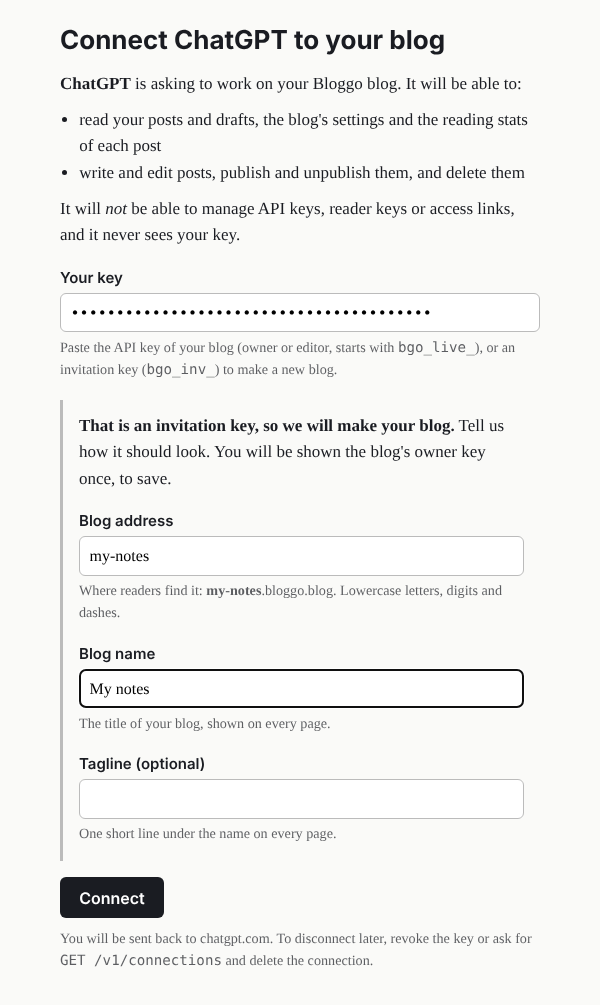
Press Connect. Bloggo makes the blog and shows you its owner key once, on a page of its own. Save it before you continue: it exists nowhere else, and you need it to make more keys later. Then the page sends you back to ChatGPT, connected to the new blog.
4. Try it
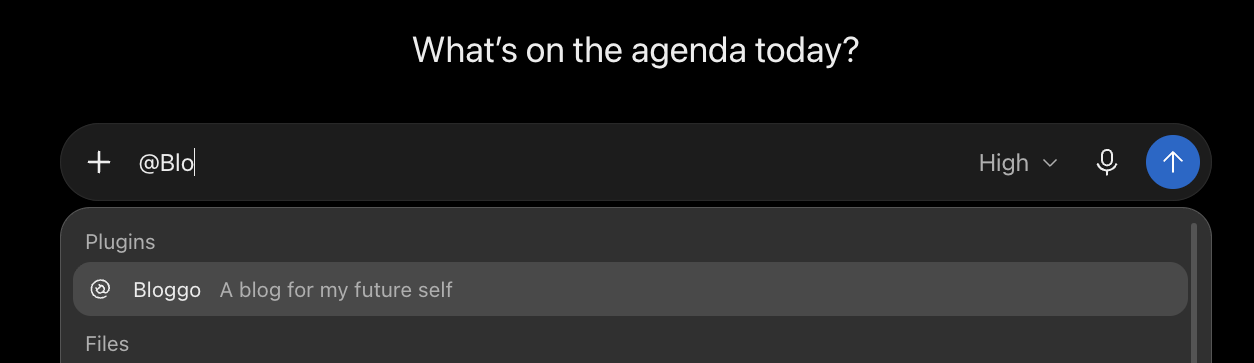
Start a new chat and type @ followed by the first letters of its name. Pick Bloggo from the list, then say what you want.
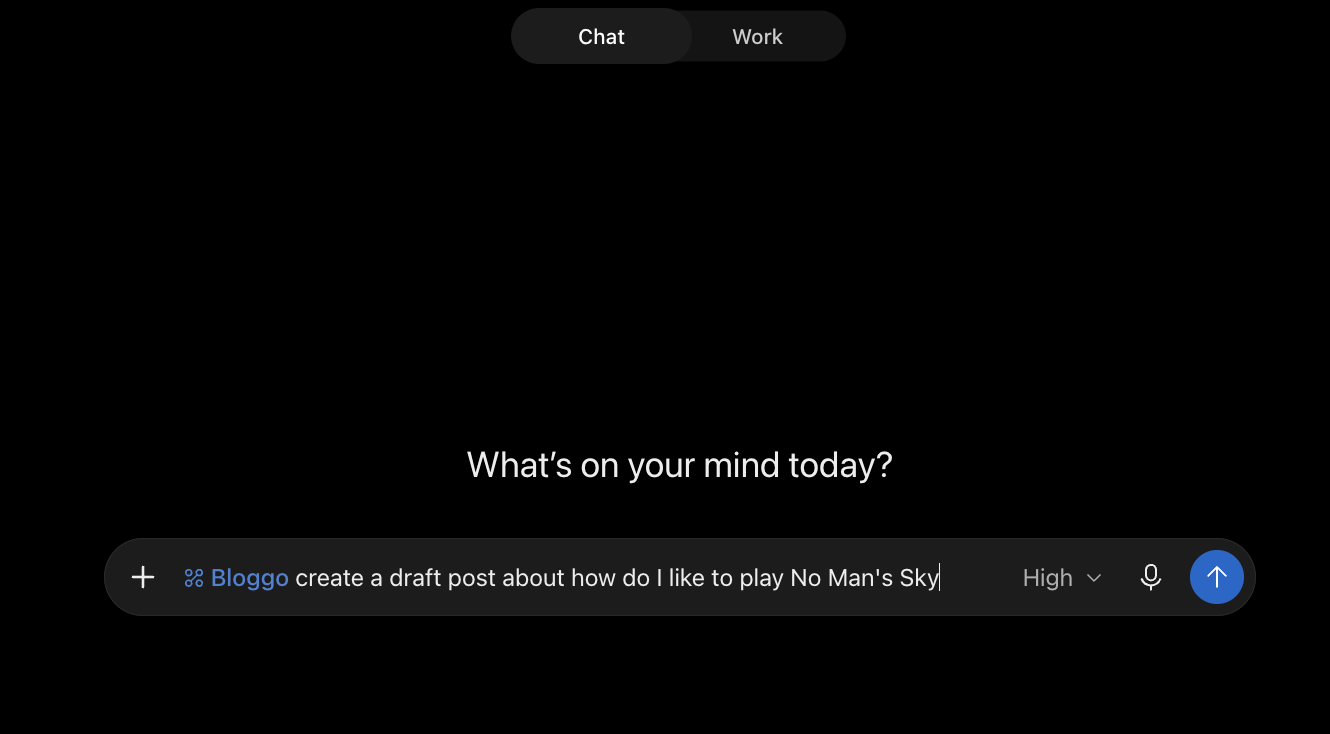
Something small is a good start:
- "List the posts on my blog."
- "Write a short post about my weekend from these notes: …" ChatGPT saves it as a draft, which only you can see, and tells you so.
- "Publish it." Bloggo only publishes when you ask. After that ChatGPT gives you the post's address.
- "Add this photo to the post." Attach the image to your message.
- "How is my last post doing?" You get views, how far readers got and likes.
- "Let me read the draft." ChatGPT gives you a link that works once; open it yourself and don't share it.
You can also see all your drafts and how every post is doing without ChatGPT: open api.bloggo.blog/sign-in, paste your key there (on that page, never in a chat), and add a passkey so next time it takes one tap.
If ChatGPT asks you for an API key in the chat, don't give it one. The connection already has access, and the key should never go through a chat.
Disconnecting
To stop ChatGPT's access, delete the plugin in ChatGPT, or revoke the editor key (DELETE /v1/keys/:id), which cuts the connection off at once. The owner of the blog can also see every connection with GET /v1/connections and delete one with DELETE /v1/connections/:id, without revoking the key.
When something goes wrong
- ChatGPT says the sign-in failed or asks you to sign in again. The key was revoked, or the connection was deleted. Connect again from step 3 with a key that works.
- "Wrong key" on Bloggo's page. The key has to be an owner, editor or invitation key. Reader keys and the admin key are refused.
- There is no way to add a custom MCP server. It is not offered on every plan, and on a Business or Enterprise workspace an admin may have to add it first. Check with your workspace admin.
For the agent's side of this, the instructions ChatGPT follows are the Bloggo MCP skill. If you would rather call the API yourself, start with the API quickstart.